
TM 5-1730-245-14
4.25 ALTERNATOR - REPLACE.
THIS TASK CONSISTS OF: a. Removal
b.
Installation
INITIAL SETUP
Tools:
Equipment Condition :
Toolkit, General Mechanics (item 5, Section III, Appendix B)
Side panels (8, fig. 1-2) removed.
Shop Equipment Automotive Maintenance and Repair:
Battery disconnected. Refer paragraph 4.19.
Organizational Maintenance, Common No. 1, less power
Cabinet top cover removed. Refer to paragraph 4.16.
(item 6, Section III, Appendix B).
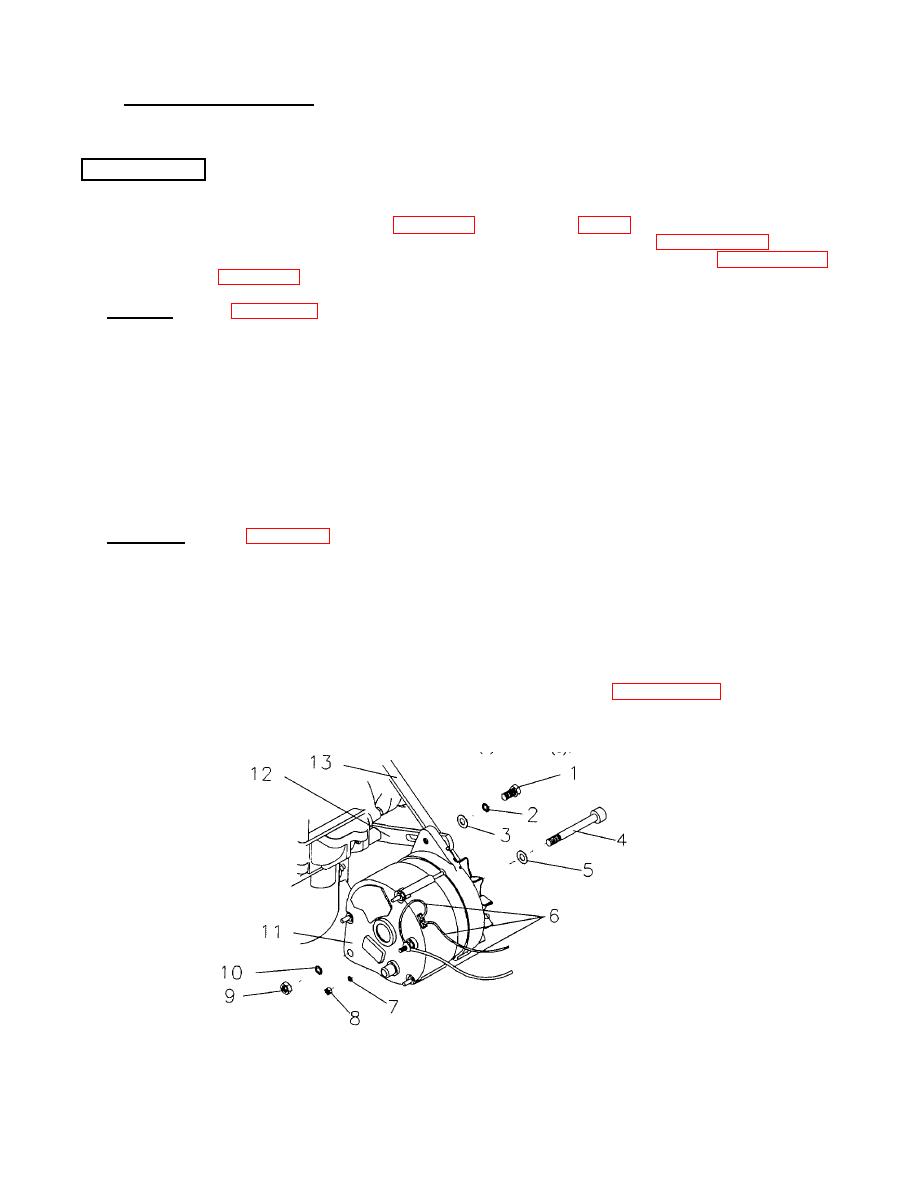
a. Removal. Refer to figure 4-16.
1) Tag and remove the three wires (6) from the alternator (11).
2) Remove and retain the adjusting link screw (1) flatwasher (2) lockwasher (3) Discard lockwasher.
3) Remove fan belt (13) from the alternator (11).
4) Support the alternator (11) and remove bottom nut (9) lockwasher (10) flatwasher (5) and bolt (4).
Discard lockwasher.
5) Remove alternator (11).
b. Installation. Refer to figure 4-16.
1) Support the alternator (11) in position and install the bottom bolt (4) flatwasher (5) lockwasher (10) and
nut (9). Hand tighten only.
2) Install the fan belt (13) in position and install the adjusting link screw (1), lockwasher (2) and flatwasher
(3) to the slotted support arm (12). Hand tighten.
3) Move the alternator (11) outward by hand to apply the proper belt tension, making sure that the belt is
properly positioned on the crankshaft and radiator fan pulleys. Refer to paragraph 4.21.
4) Install the alternator wires (6). Secure with lockwashers (7) and nut (8).
Figure 4-16. Alternator.
4-32

